I struggled to organize a post about SkullStar because it offers so much to describe and explain. Here I try managing it in multiple parts.
First conception
I unpacked a new dining room table and discovered two exciting facts about the packaging:
- The box was double-corrugated cardboard
- The packing foam included two discs almost perfectly matching the 42 inch table diameter

I wanted to build a couple playing surfaces I could haul out of the workshop and set up on the dining room table. Leading ideas included a circular arena for Gaslands (still likely to happen), and an all-purpose board for skirmish-scale games like Frostgrave and Five Parsecs from Home.
An all-purpose skirmish board would need to be generic enough to support both fantasy and sci fi games, or else flat enough to set other gaming boards on top. It would also need to accommodate the fact that most game rules assume a rectilinear playing surface. Most importantly, it would need to be interesting and attractive.
I let the project simmer in the back of my mind for a few weeks.

Heeding the Warcry
Inspiration struck when my friend Lawrence and I played a game of Warcry at the dining room table. I realized the Games Workshop standard 22 by 30 inch playing surface could see plenty of use there. Coincidentally I discovered that locally-available foam core sheets measure 20 by 30 inches, freeing me from excessive measuring and cutting. I set to work.
First, using construction adhesive I glued a foam disc to a cardboard disc I had cut from the shipping box. Then I bisected the foam disc with a line and centered and glued down the foam core board. That sounds straightforward in two sentences, but involved a couple evenings of head scratching, trying to remember geometry tricks, and mumbling at a glue dispenser.


Finally I glued inch-wide rectangles along each long edge of the foam core to widen the short edges to 22 inches

Pausing for inspiration
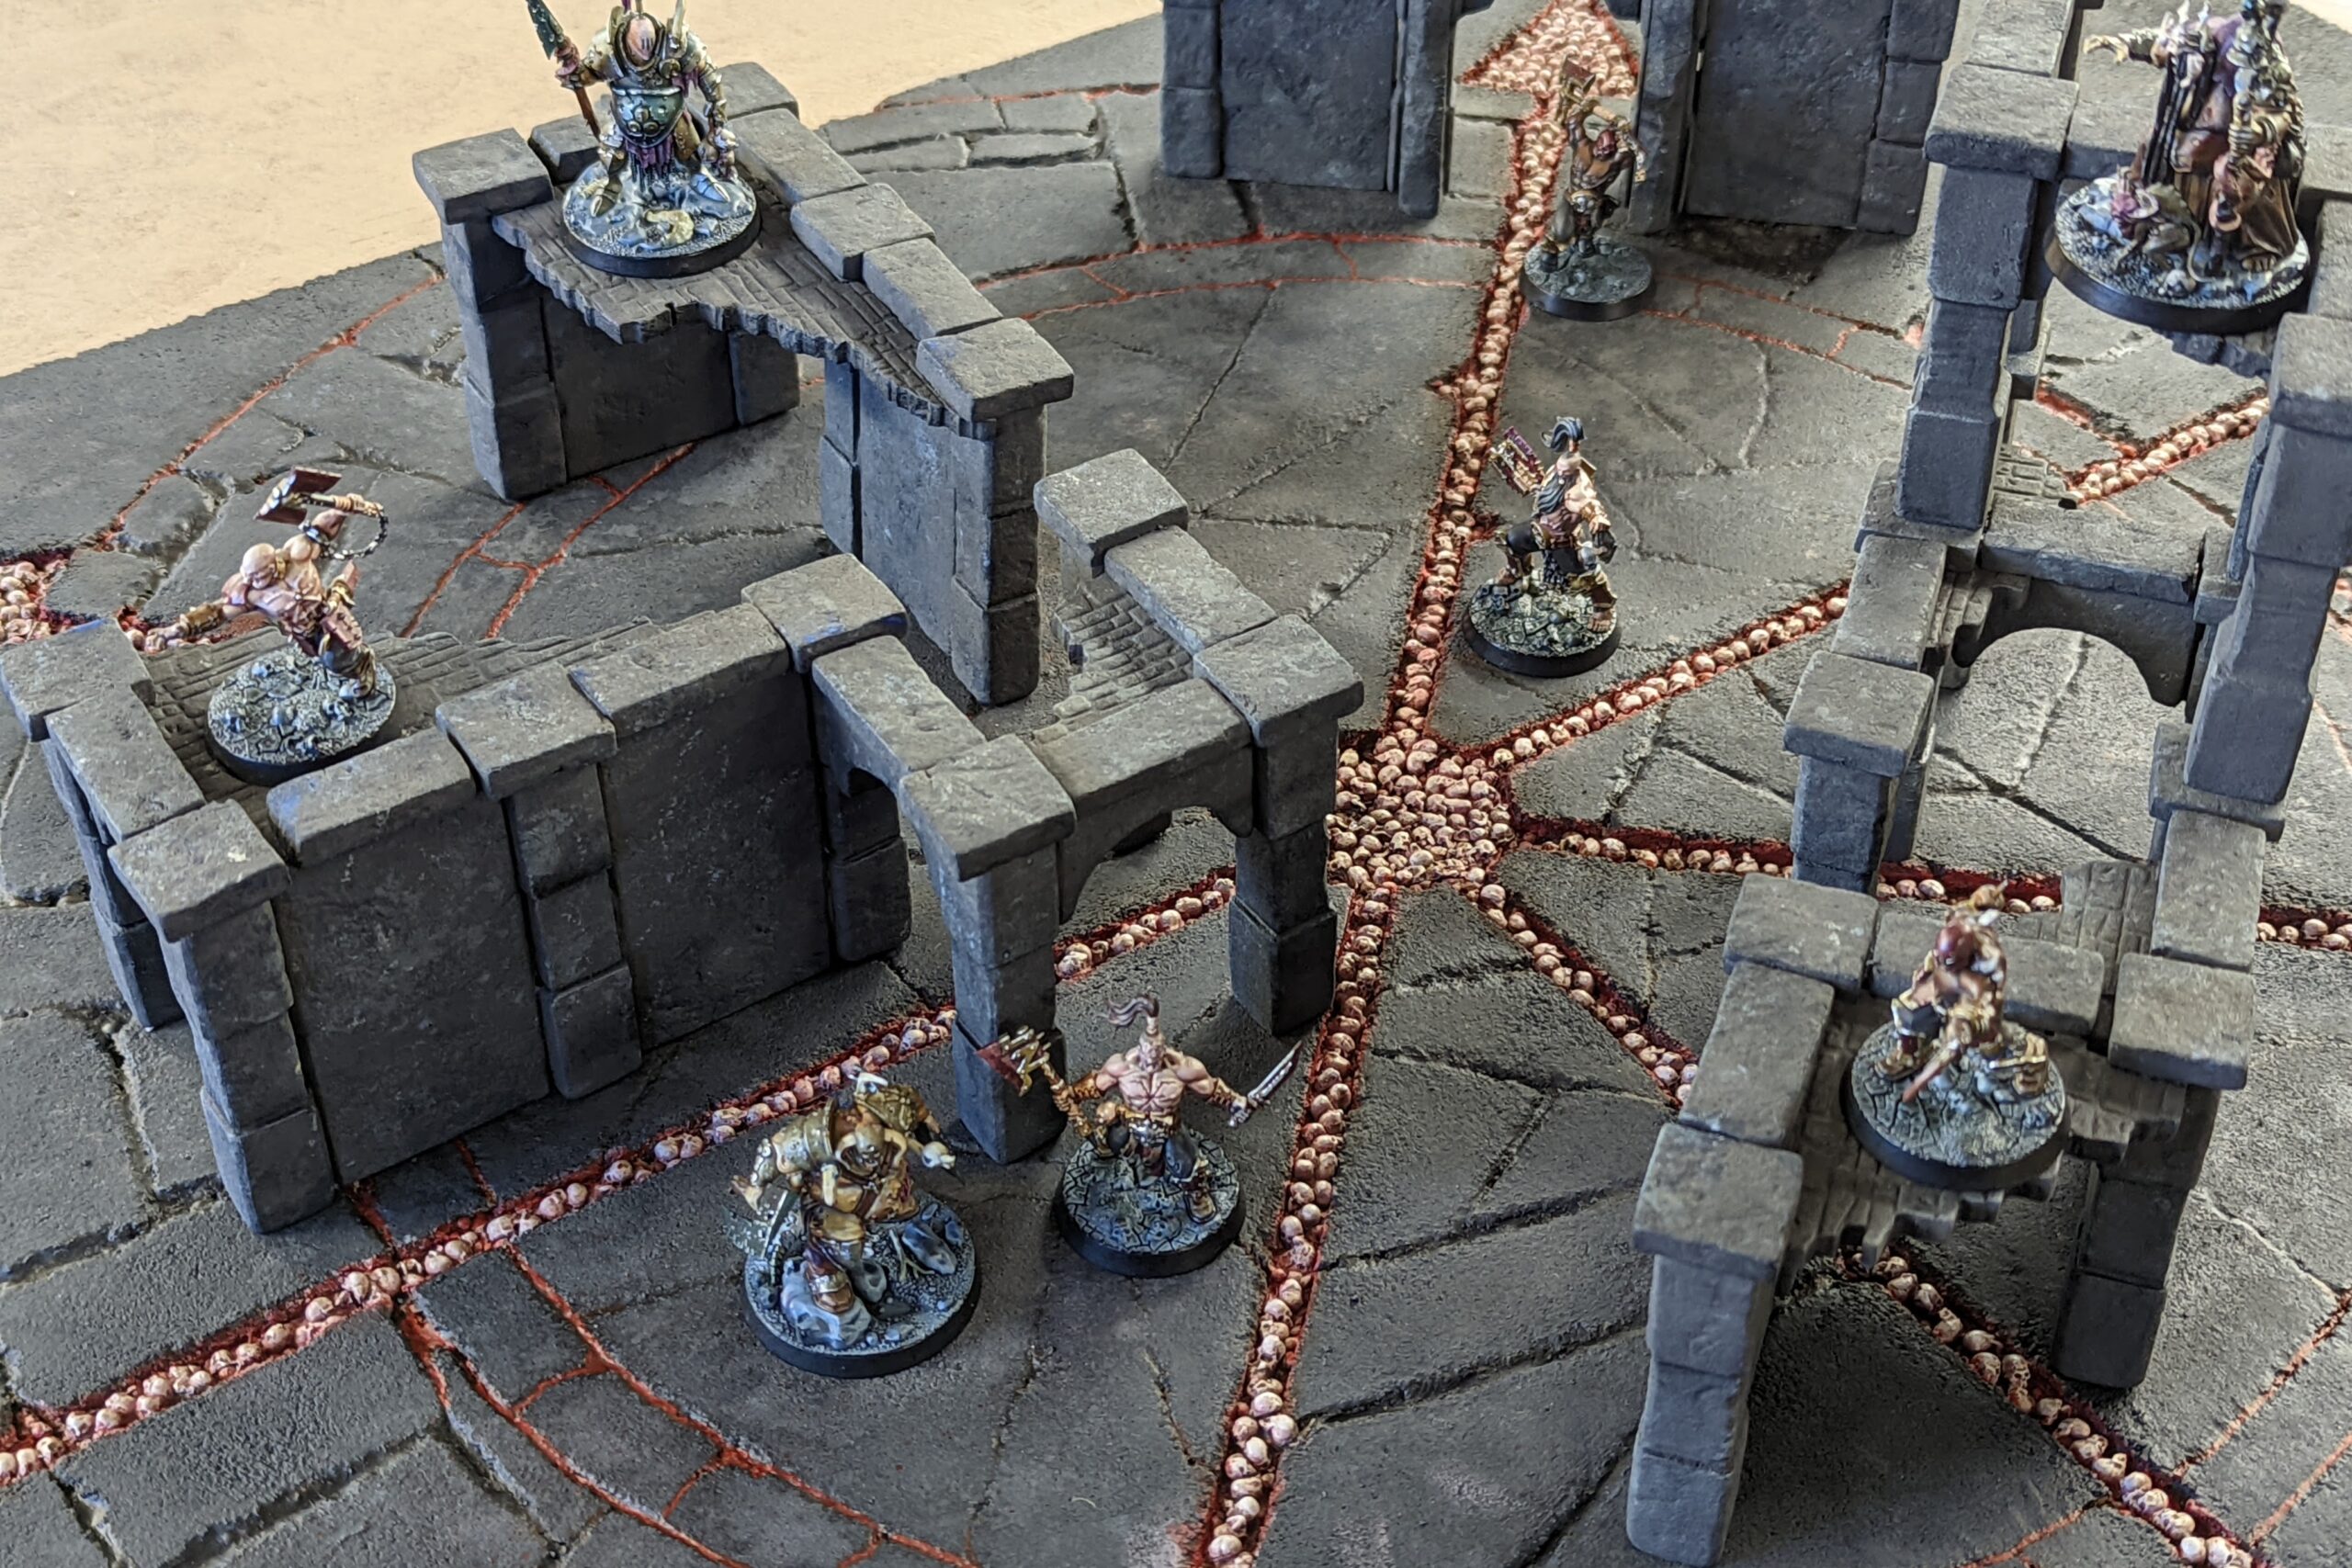
I got stuck here and set the project aside while thinking about the board’s final form. How could I make it flat without also making it boring? Part 2 will begin to describe how I came to answer that question with “a chaos star made from skull trenches.”
Your comment sustains me