About a year ago my gaming group decided to collaborate on a terrain board to prepare for the release of Frostgrave 2nd Edition. After some back-and-forth in our Slack team, we agreed to build modular tiles using shared standards for certain key geometries and base coat colors. We could consult each other remotely, build in isolation, and then come together with a cohesive result when circumstances allowed.
Knowing we wouldn’t be able to meet for games for maybe a long time, I cherished having a shared project with a big payoff to look forward to. Once we finally got together on my back patio for a socially-distant campaign kickoff, I knew we were onto something wonderful.

Basic elements
As our basic modular tile, we chose 1.5-inch thick XPS foam attached to and cut to fit a 12-inch by 12-inch peel-and-stick floor tile. This proved the right balance for us between cost, consistency, portability, and adaptability.

For color, we shared a gallon of Clark+Kensington Black Chiffon latex house paint for our common gray base coat and used our own individual tubes of raw umber craft paint for brown.
Beyond those few standards, we were each free to make whatever we wanted. We chased our muses far and wide, with beautiful results.

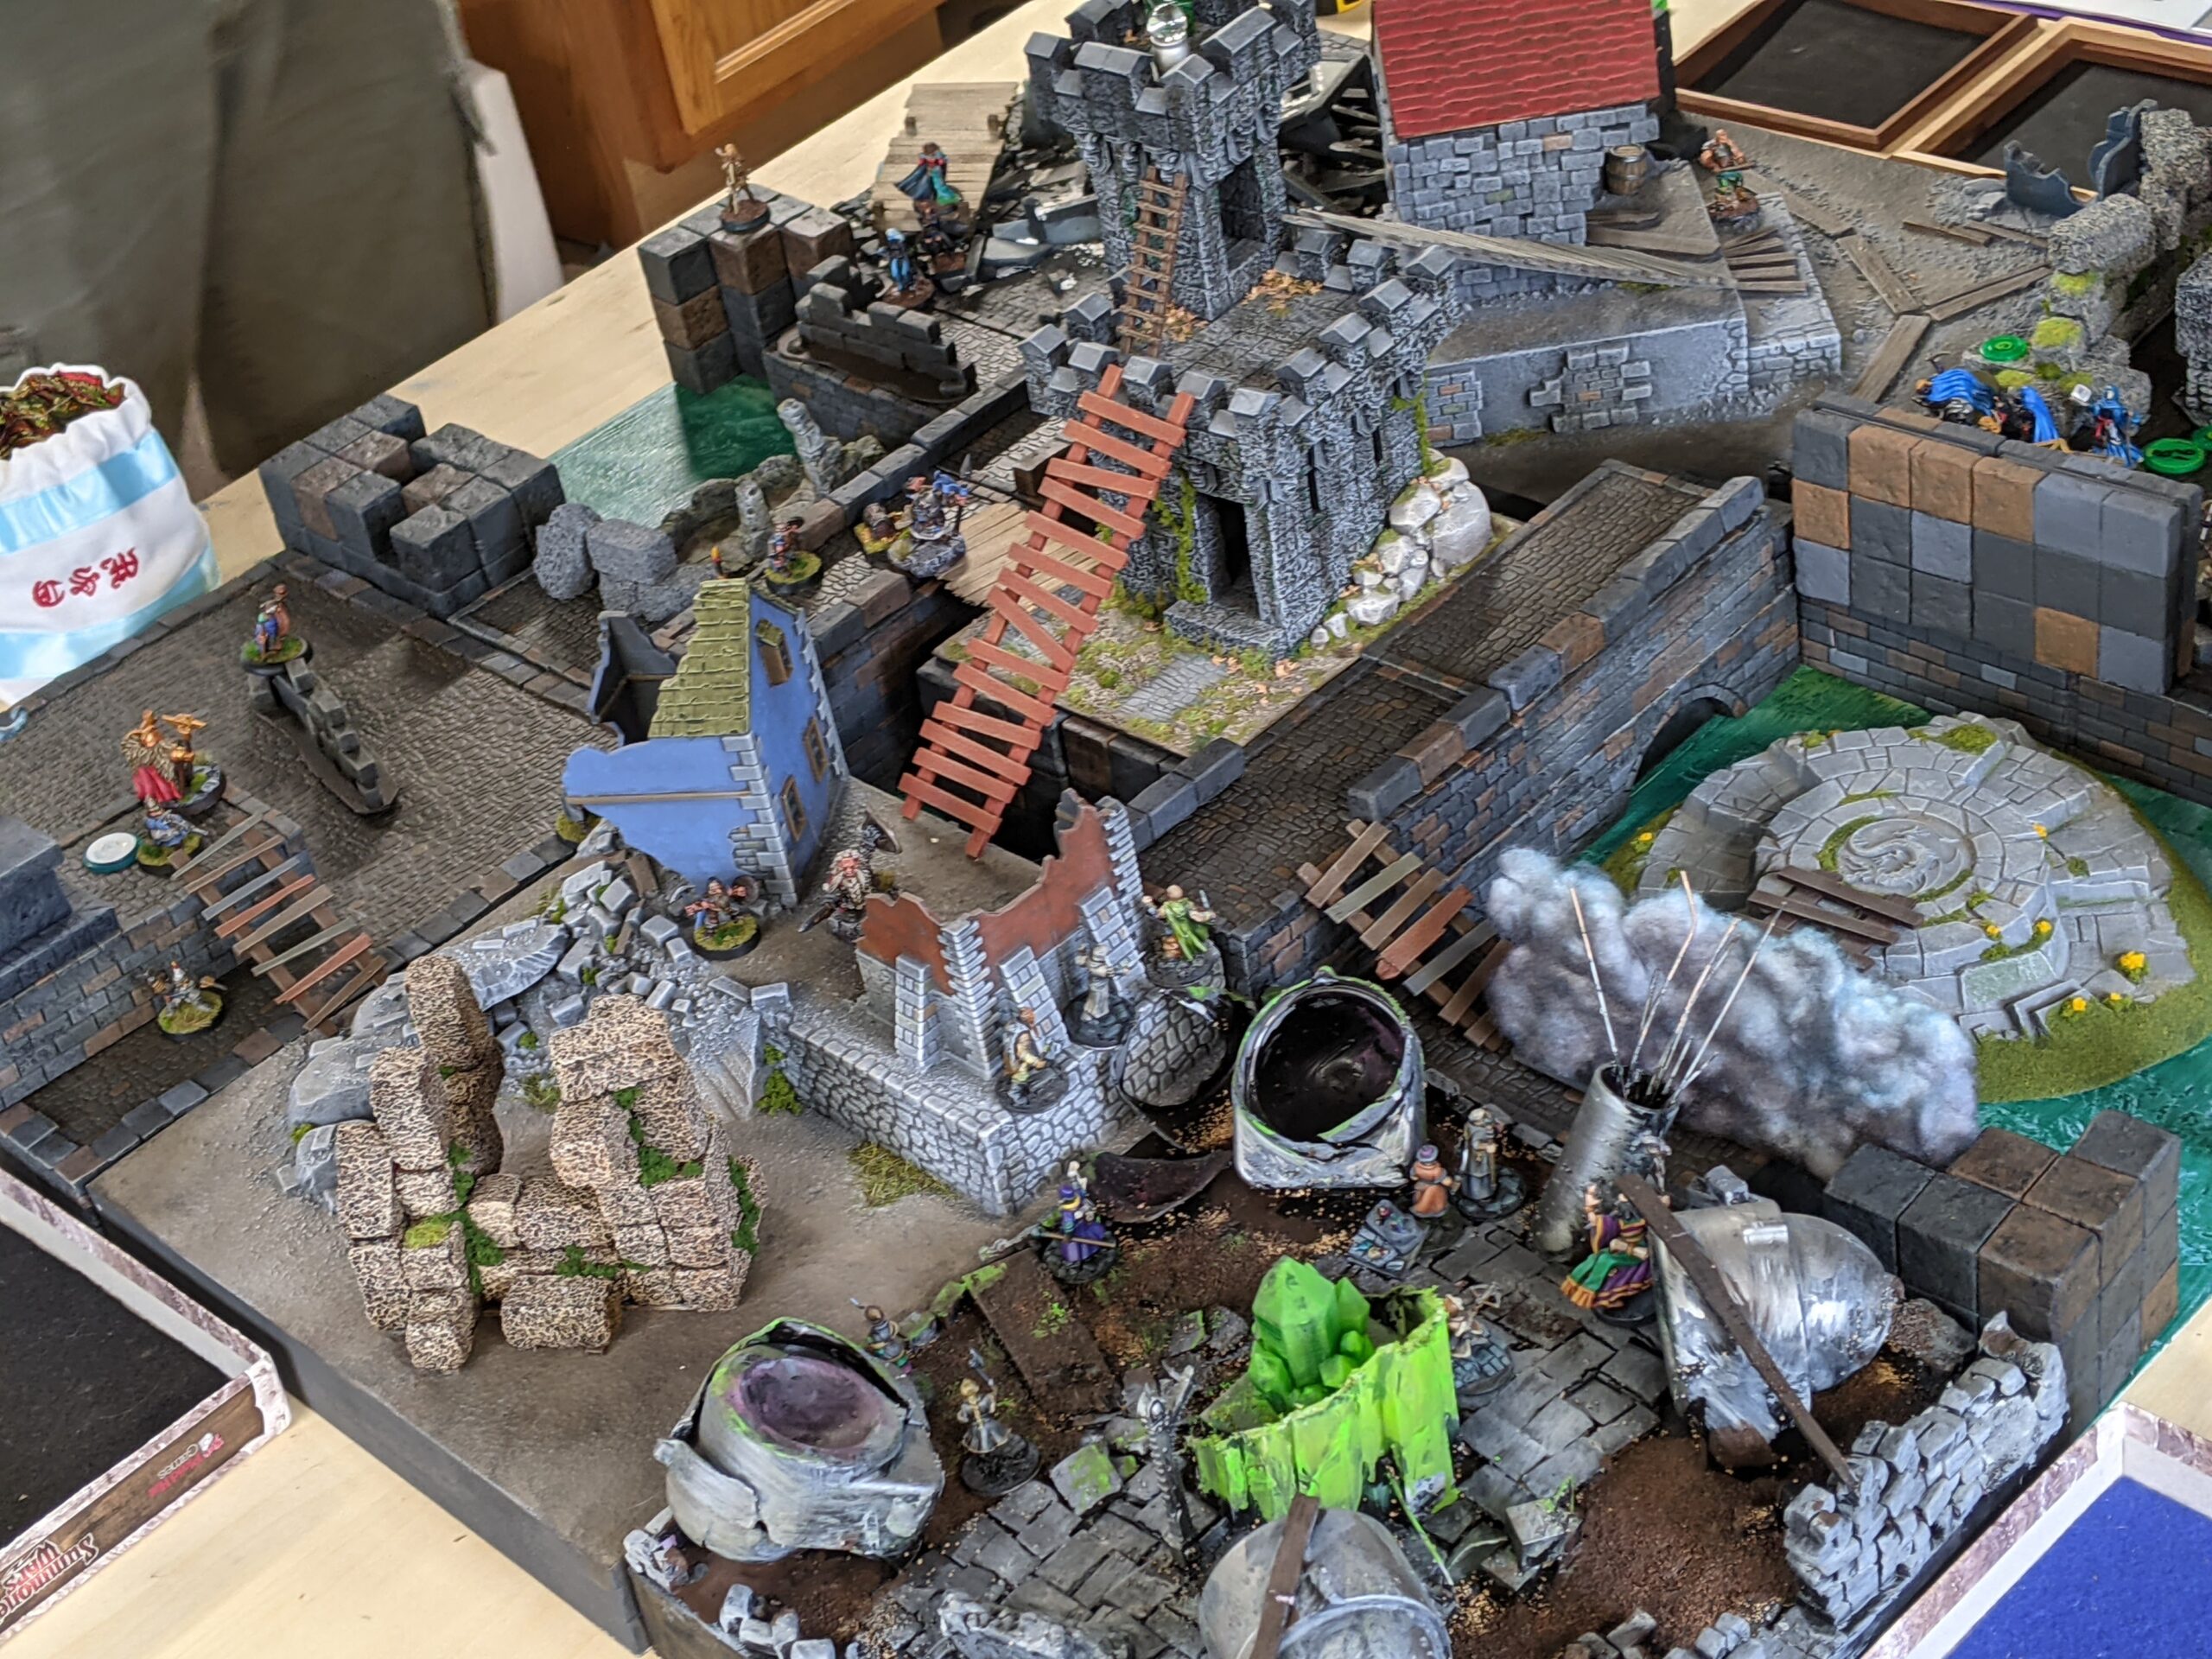
Ruined residences by Patrick 
Contraption catastrophe by Vince 
Stairs to somewhere by Lawrence
My first tile
I started with a concept for a floating villa that crashed to the ground and toppled over sideways.

One weekend I was stuck inside because my state was on fire, and my house had no electricity. I knew an opportunity when I saw it! I assembled most of my tile that day, and added and refined elements gradually for another week. After a few more enjoyable evenings painting, I had my first tile done.


By then we had five of the nine tiles we would need for a standard Frostgrave game. I started daydreaming of a canal district to build next.
Canal district
I thought canals would be interesting both visually and tactically, but I struggled to choose a satisfactory design. If I built the canals into the tiles themselves we would be limited where we could place them, and I couldn’t commit to a single canal width.
After mulling it over, I found a solution. I would paint canal water across whole floor tiles, then build free-standing 6-inch by 3-inch blocks to place on top of them wherever we needed. That way, I could use more or fewer blocks to create waterways of different widths. I used a cookie cutter to add arches to about a third of them, to use as bridges and sewer entrances.

Carving bricks into the sides took many evenings half-listening to sitcoms. After that, I was ready for any shortcuts I could find. Luckily, Comrade Patrick had kindly given me most of a roll of Christmas village vinyl cobblestone streets, which topped all these canal banks in no time. I liked that solution so much, I extended it to a couple full-size 12-inch by 12-inch flat “utility” tiles to support free-standing terrain and fill out our board.

For the canal surface, I bought a few stiffer floor tiles and painted the sticky sides with successive layers of acrylic inks and Mod Podge to build up a sketch of an ancient frozen canal. The flat tiles combine nicely with free standing scenery and with built-in terrain tiles to balance flexibility and playability with visual appeal. Surplus 6-by-3 blocks can even be stacked on the flat tiles to create interesting height variation.
Development continues
Now that we’re up and running, our scheme can support sporadic incremental additions whenever we feel like making them. I have three more tiles in progress, and a number of supplemental free-standing projects to extend the variety and usefulness of our board. The best part: we have re-entered the virtuous feedback loop where the games we play inform and inspire the terrain projects we undertake. I plan to share more about ongoing and future projects as I go through them.
Your comment sustains me